Straight onto the fabric
The current plan goes from PatternNest to the projector, with no PDF and no second program. The projector PDF of the full version stays as it is.


PatternNest add-on · €4 one time, no subscription
For everyone who cuts with a projector. The plan goes onto the fabric with no PDF in between, long plans come step by step, and you tick off every piece you cut.
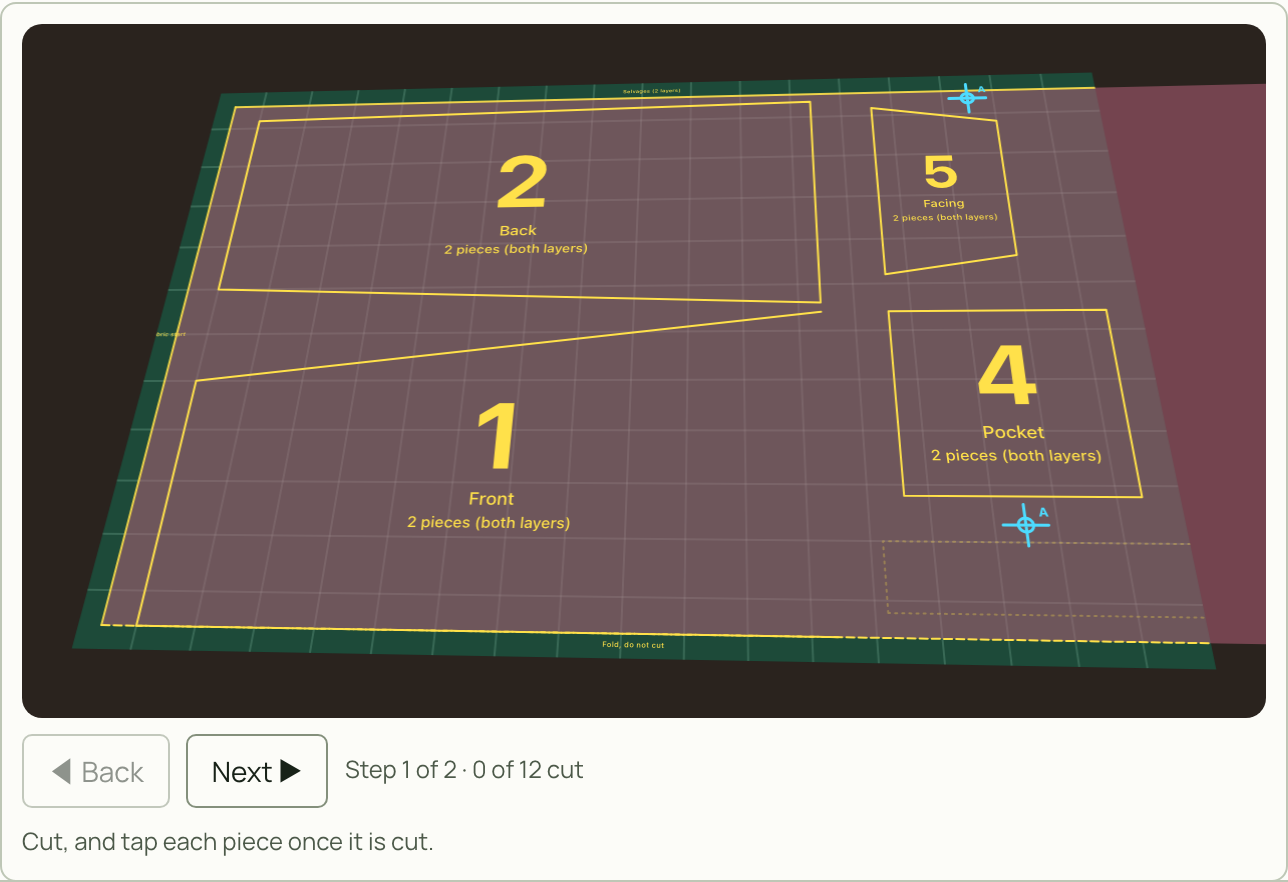
The current plan goes from PatternNest to the projector, with no PDF and no second program. The projector PDF of the full version stays as it is.
You enter the size of a rectangle on your cutting mat (default 90 × 60 cm or 36 × 24 in) and drag the four corners onto it. If the projector hangs upside down or projects through a mirror, you flip the image. A 10 cm test square shows whether it is right, also later while you cut.
If the plan is larger than the lit area, the instructions tell you how far to pull the fabric, for example “Pull the fabric 66 cm towards you, until your marks sit on the crosses A.” A piece that fits the area is never split over two steps.
Tap a piece once it is cut and it turns grey with a tick. You see how many pieces are cut, and the progress stays saved in the project.
The current piece carries a large number with its name and quantity below. You set the line width, six colours and a light variant for light fabrics, and switch markings and labels on or off.
For thick fabrics the companion corrects for the height of the fabric. You enter the thickness per layer and the distance from the lens to the mat.
If you prefer projecting the projector PDF with another program, “Whole plan” shows everything at once and the companion is your tick list next to it.
Calculate your plan as usual. In the export card, below the projector PDF, there is the button “Cut at the projector”.
Tap “Open projector window”, drag the window onto the projector screen and switch it to full screen there. Or use “Full screen here”. Then “Calibrate” once.
Lay the fabric, cut, tap the pieces. “Next”, the arrow keys or the space bar take you to the next step.
Add-ons extend the full version of PatternNest (€14 one time, launch price until 30 November, then €24). The full version stays as it is. Everything PatternNest does today is still in it, the add-ons only come on top.
Pay once, keep it, no subscription. The add-on belongs to your license and works offline too. Prices include applicable taxes.


