
How much extra fabric for plaid and stripes?
If you want plaid or stripes to meet at the seams, you usually buy extra fabric on a hunch. I computed how much extra it really takes for a skirt and a shirt from free FreeSewing patterns: on 110, 140 and 150 cm width, without matching, with plaid and with horizontal stripes, each with a 3, 6 and 12 cm repeat.
Short answer: For the pencil skirt, matching a plaid or horizontal stripes cost nothing on 140 and 150 cm wide fabric and 1 to 5 cm on 110 cm. The long-sleeved shirt needed 12 to 40 cm more on 140 and 150 cm, more for a larger repeat. The common rule of thumb of an extra half metre for skirts and tops covers all of these cases.
The numbers at a glance
Fabric length in a single layer with 1 cm seam allowance, in brackets the extra over the layout without matching. Plaid here means the same repeat in length and width.
| Pattern and width | Without matching | 3 cm plaid | 6 cm plaid | 12 cm plaid |
|---|---|---|---|---|
| Pencil skirt, 110 cm | 1.37 m | 1.38 m (+1 cm) | 1.41 m (+4 cm) | 1.42 m (+5 cm) |
| Pencil skirt, 140 cm | 0.84 m | 0.84 m (+0 cm) | 0.84 m (+0 cm) | 0.84 m (+0 cm) |
| Pencil skirt, 150 cm | 0.84 m | 0.84 m (+0 cm) | 0.84 m (+0 cm) | 0.84 m (+0 cm) |
| Long-sleeved shirt, 140 cm | 1.74 m | 1.86 m (+12 cm) | 2.08 m (+34 cm) | 2.14 m (+40 cm) |
| Long-sleeved shirt, 150 cm | 1.61 m | not shown | 1.90 m (+29 cm) | 1.94 m (+33 cm) |
The shirt on 110 cm and the shirt with a 3 cm plaid on 150 cm are not in the table. The shirt section below explains why.
The patterns and the matching
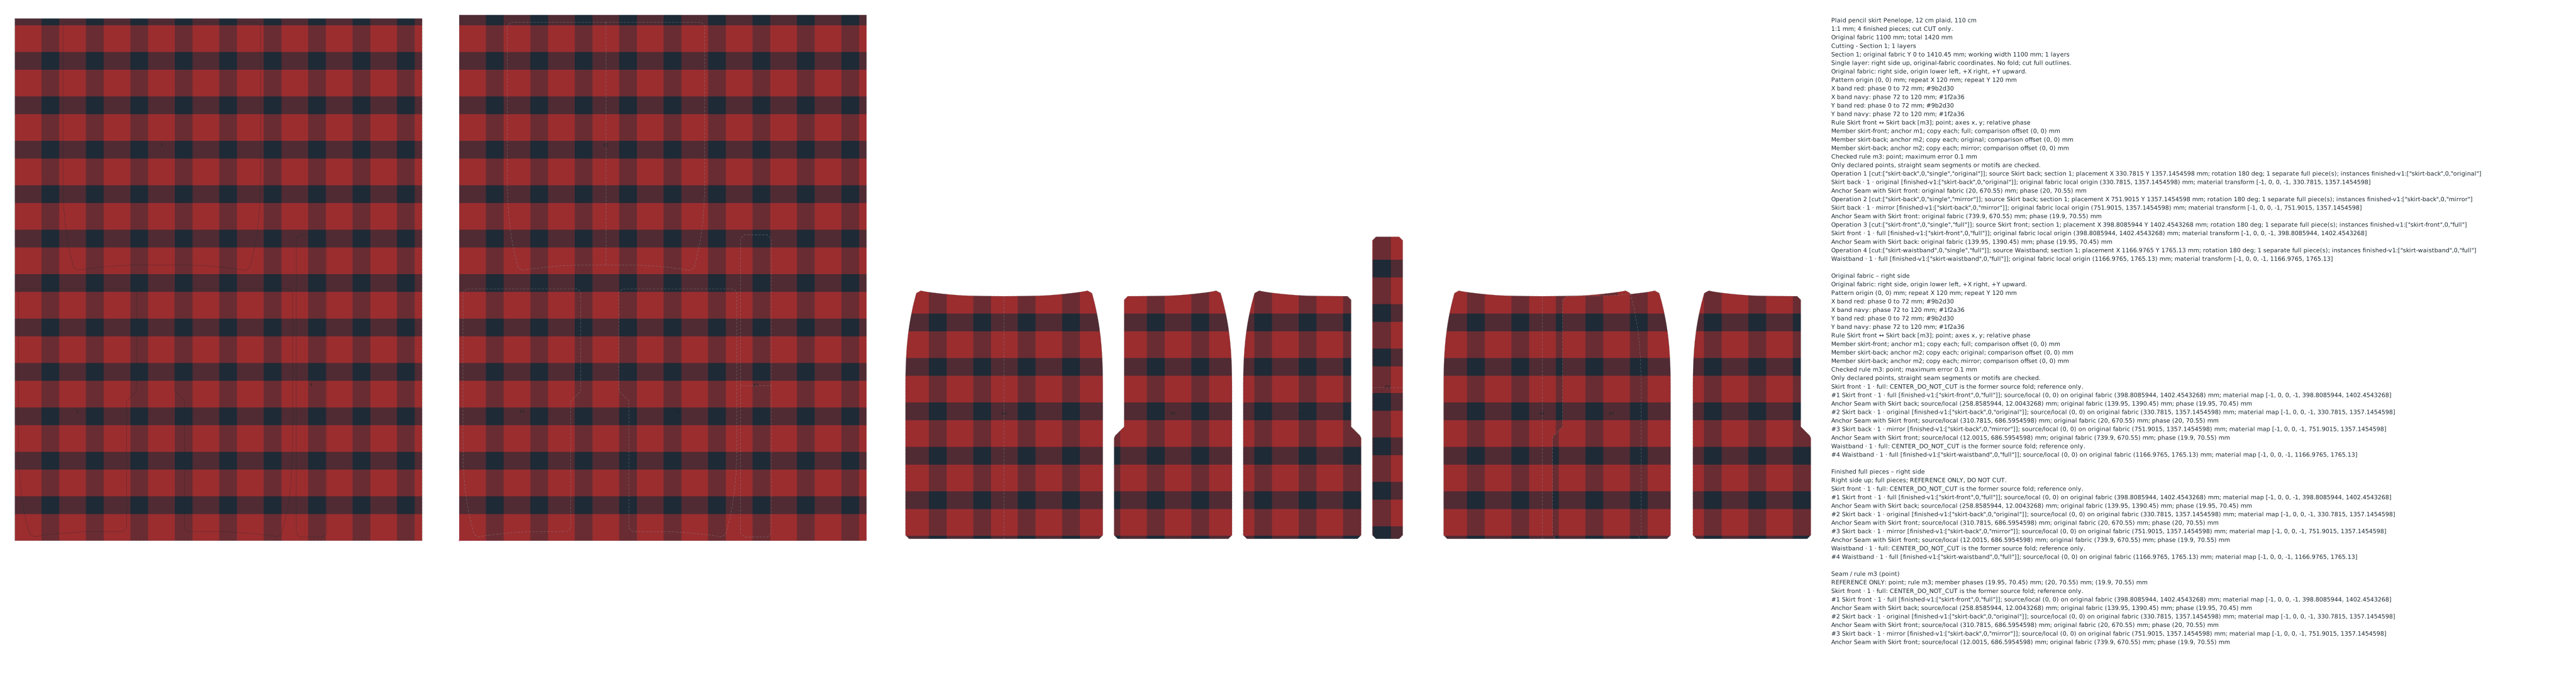
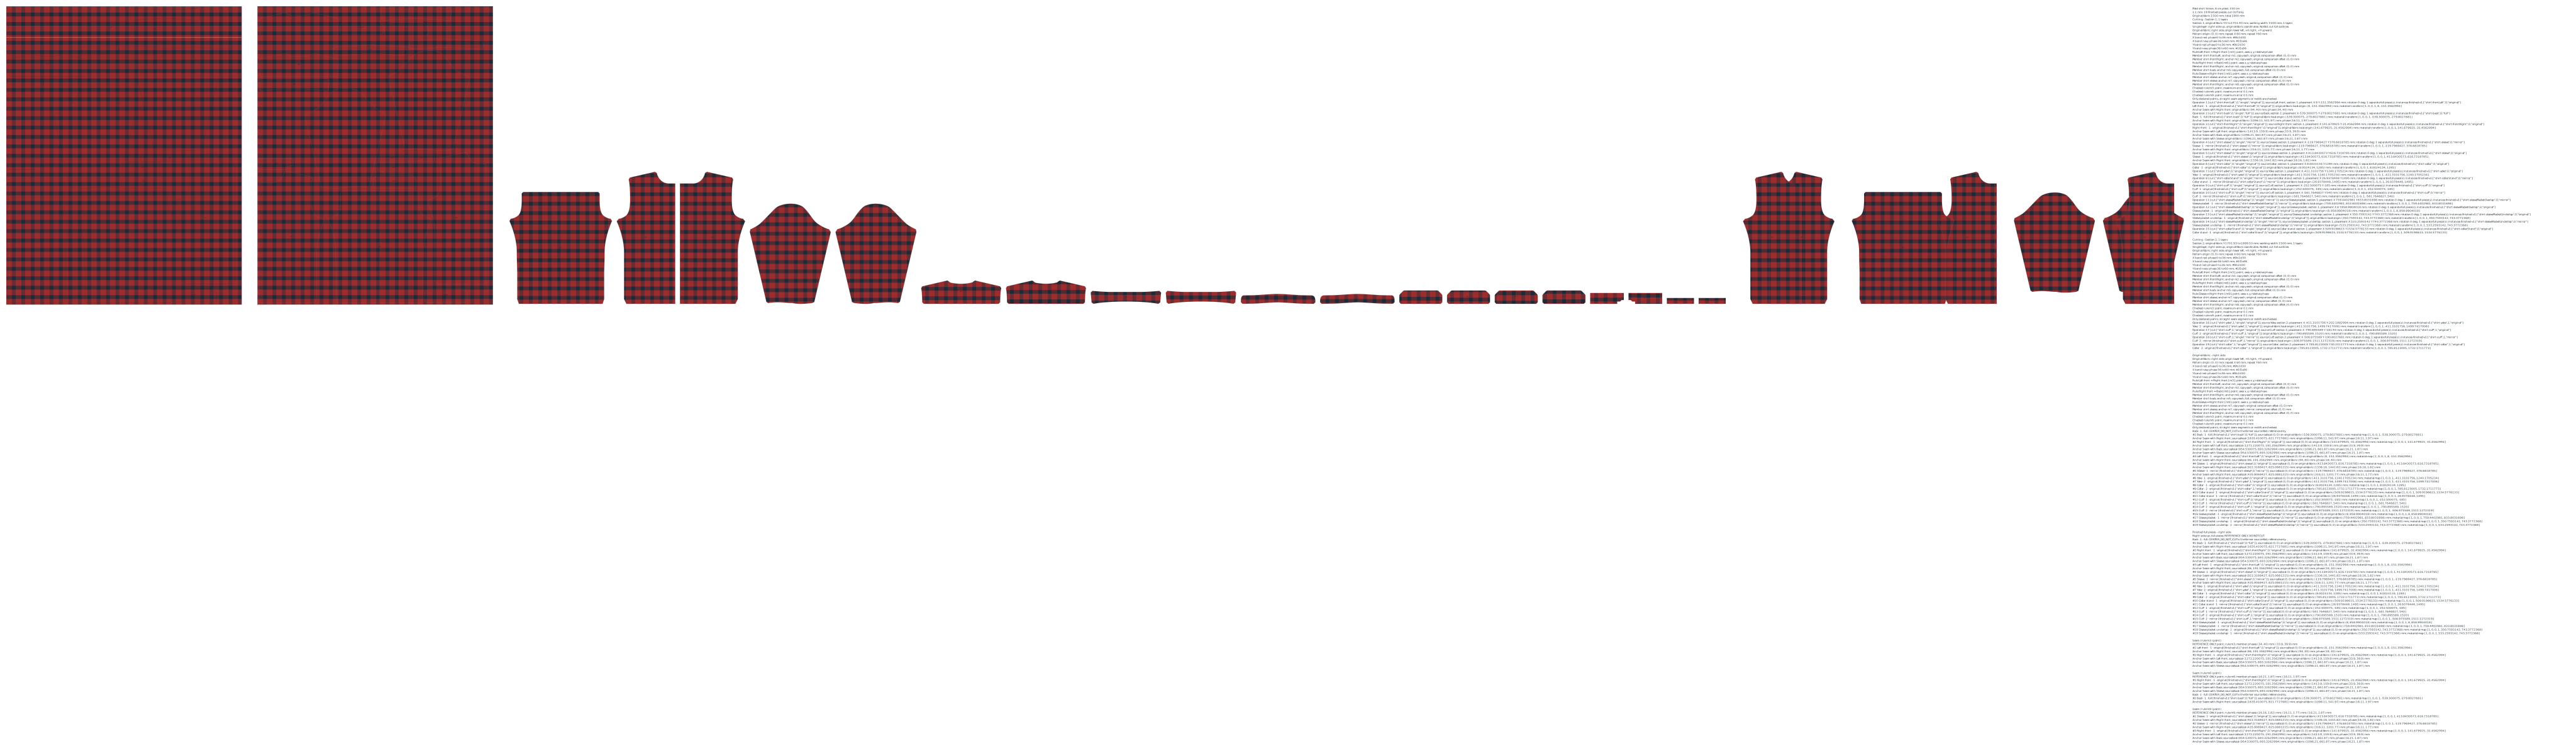
I computed two free patterns from FreeSewing, both under the MIT licence and exported with FreeSewing 4.10.2 and 1 cm seam allowance. The pencil skirt Penelope by Wouter Van Wageningen in FreeSewing's measurement set cisFemaleAdult36, hips 95.3 cm, knee length. It has 4 pieces: front on the fold, two backs, waistband on the fold. The men's shirt Simon by Joost De Cock in cisMaleAdult42 with long sleeves has 19 pieces.
I matched the places you see on the finished garment. On the skirt the side seam at the hem: front and back meet on the same line there. On the shirt three seams: the centre front at the bottom, so the lines run on when the shirt is buttoned, the side seam under the arm, and the sleeve against the front under the arm. Each seam is one rule with two clicks in PatternNest.
All layouts in a single layer, with 1 cm between pieces and the effort Standard. Pieces may lie turned by 180 degrees, because the plaid and stripes here have no direction. Horizontal stripes means the stripes run across the fabric and repeat along its length.
Pencil skirt: on wide fabric matching costs nothing
| Pencil skirt | 110 cm | 140 cm | 150 cm |
|---|---|---|---|
| Without matching | 1.37 m | 0.84 m | 0.84 m |
| 3 cm plaid | 1.38 m (+1 cm) | 0.84 m (+0 cm) | 0.84 m (+0 cm) |
| 6 cm plaid | 1.41 m (+4 cm) | 0.84 m (+0 cm) | 0.84 m (+0 cm) |
| 12 cm plaid | 1.42 m (+5 cm) | 0.84 m (+0 cm) | 0.84 m (+0 cm) |
| 3 cm horizontal stripes | 1.38 m (+1 cm) | 0.84 m (+0 cm) | 0.84 m (+0 cm) |
| 6 cm horizontal stripes | 1.41 m (+4 cm) | 0.84 m (+0 cm) | 0.84 m (+0 cm) |
| 12 cm horizontal stripes | 1.42 m (+5 cm) | 0.84 m (+0 cm) | 0.84 m (+0 cm) |
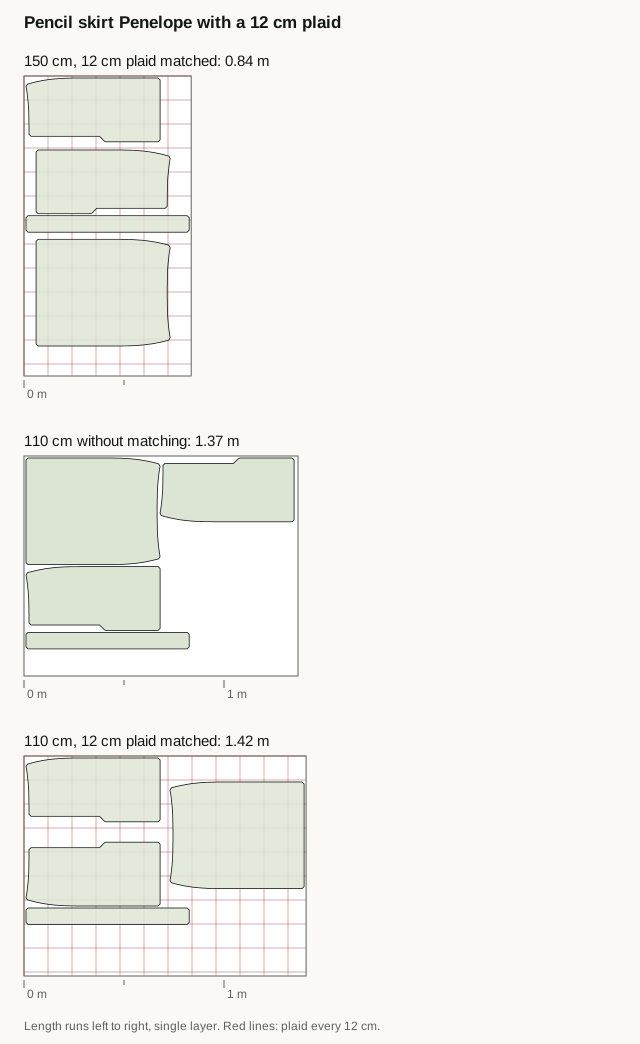
On 140 and 150 cm all pieces of the skirt lie side by side. PatternNest can then slide each piece along the length until the line at the side seam is right, without making the fabric longer. With and without matching it is 0.84 m.
On 110 cm front and back no longer fit side by side. The second piece then has to start on a plaid line, and that costs: 1 cm with a 3 cm plaid, 4 cm with 6 cm and 5 cm with 12 cm. On the skirt horizontal stripes cost exactly as much as plaid, because all that matters here is where the second piece starts along the length.
Long-sleeved shirt: 12 to 40 cm more
| Long-sleeved shirt | 140 cm | 150 cm |
|---|---|---|
| Without matching | 1.74 m | 1.61 m |
| 3 cm plaid | 1.86 m (+12 cm) | not shown |
| 6 cm plaid | 2.08 m (+34 cm) | 1.90 m (+29 cm) |
| 12 cm plaid | 2.14 m (+40 cm) | 1.94 m (+33 cm) |
| 6 cm horizontal stripes | 1.86 m (+12 cm) | not shown |
| 12 cm horizontal stripes | 1.94 m (+20 cm) | not shown |
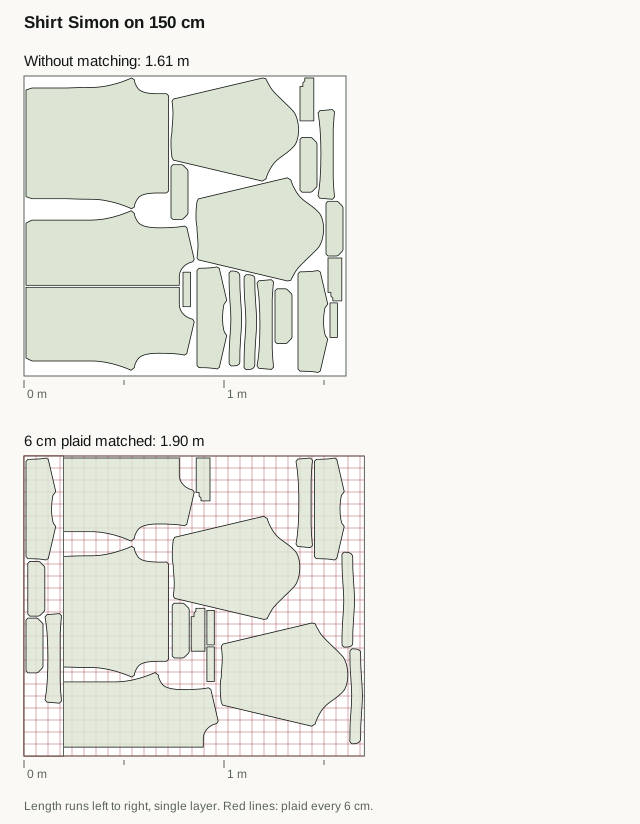
On the shirt three seams have to match, and 19 pieces share the width. On 150 cm it needs 29 cm more with a 6 cm plaid and 33 cm more with 12 cm. On 140 cm it ranges from 12 cm with a 3 cm plaid to 40 cm with 12 cm. Horizontal stripes cost less than plaid, because only the height has to match: on 140 cm 12 cm with 6 cm and 20 cm with 12 cm.
The cells marked not shown are left out on purpose. There PatternNest with the effort Standard did not find a compact layout and put all pieces one below the other, over 5 m. On 110 cm the shirt results contradicted each other by 1 to 3 cm. Both are logged as bugs. If your layout with matching comes out much longer than without, set the effort to Max (slow, tightest) and calculate again.
What the rules of thumb say
Seamwork's How to Match Plaids, Stripes, and Large Patterns (Piper Springs, 2015) suggests an extra half yard or half metre for separates like a skirt or top and a yard or metre for a dress. The more precise way given there: count one repeat for each piece in a row and add one repeat as a reserve. The plaid guide at sewing.org names one extra repeat as the minimum.
Next to the computed layouts it looks like this: the half metre is on the safe side for every case here, by a wide margin for the skirt, which needed at most 5 cm more. A single extra repeat would not have been enough for the shirt: with a 12 cm plaid on 150 cm it needed 33 cm more. How much your pattern needs depends on whether the matched pieces have room side by side. The layout shows that.
How to compute your own fabric
The clicks at the seam are also explained with pictures in Match stripes at the side seam.
- Open PatternNest, load your pattern with seam allowance with Choose files… under Pattern pieces and set each piece's quantity from the cut list.
- Choose the fabric width and Single layer under Fabric layout. Click Calculate layout: that is your length without matching.
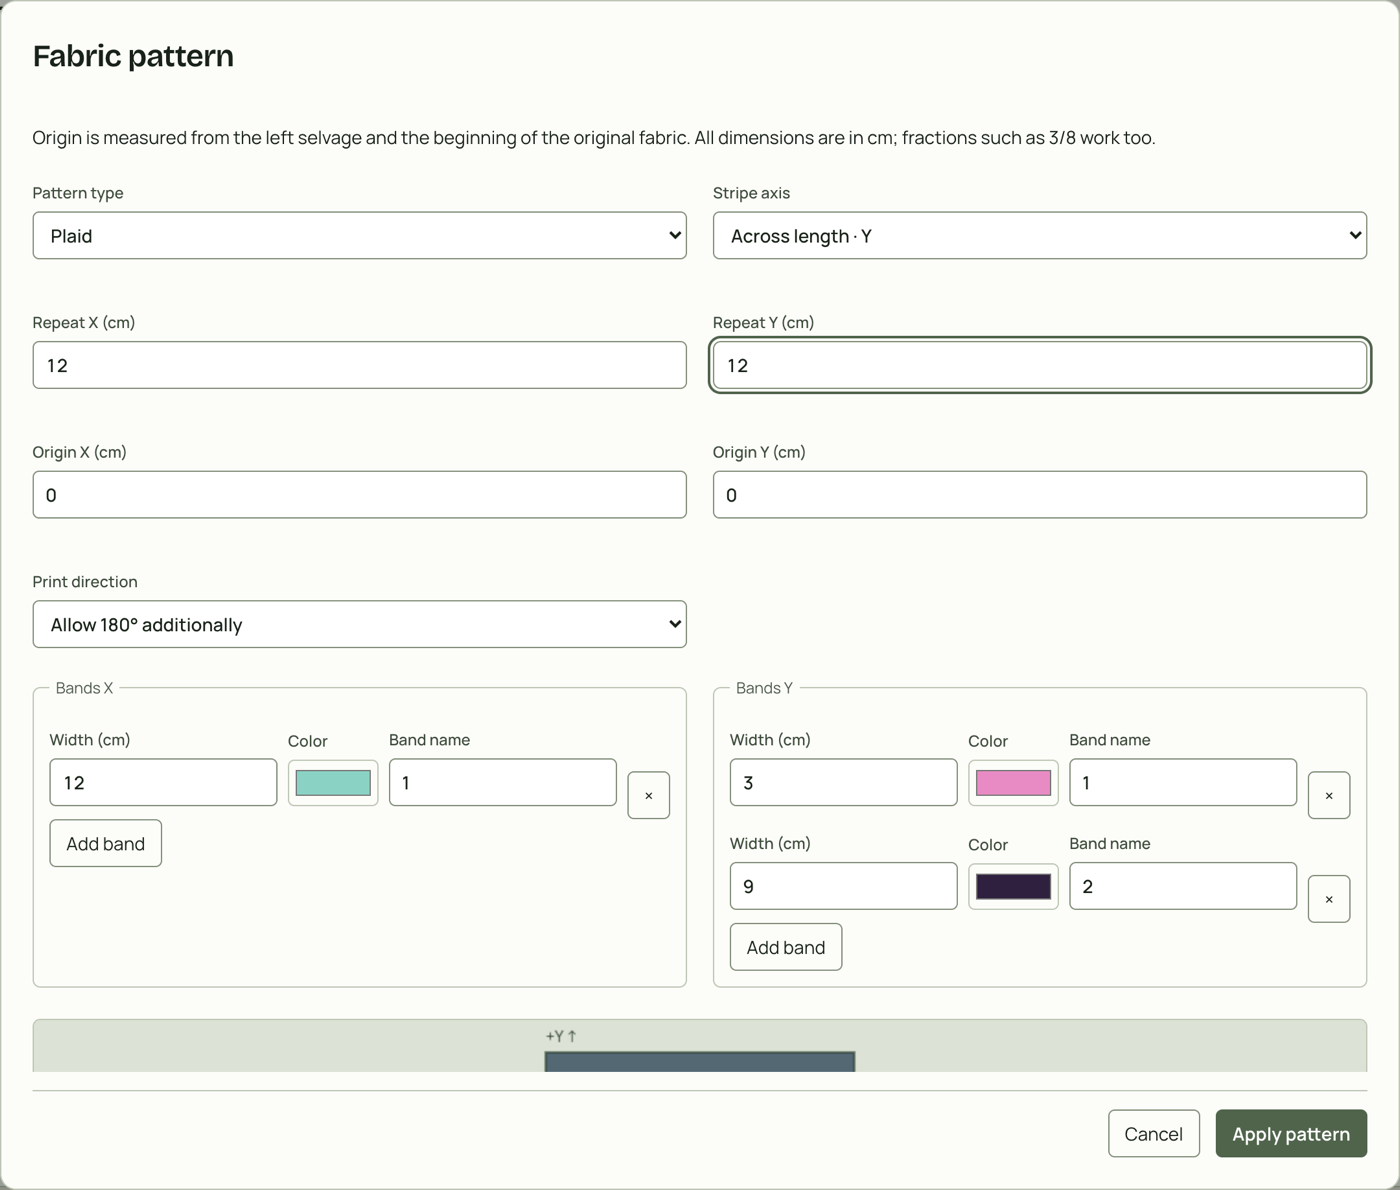
- Click Fabric pattern. Choose Plaid or Stripes as the pattern type and enter the repeat, for a plaid in both directions, for horizontal stripes with the stripe axis Across length · Y. If the fabric has no direction, choose Allow 180° additionally as the print direction. Then Apply pattern.
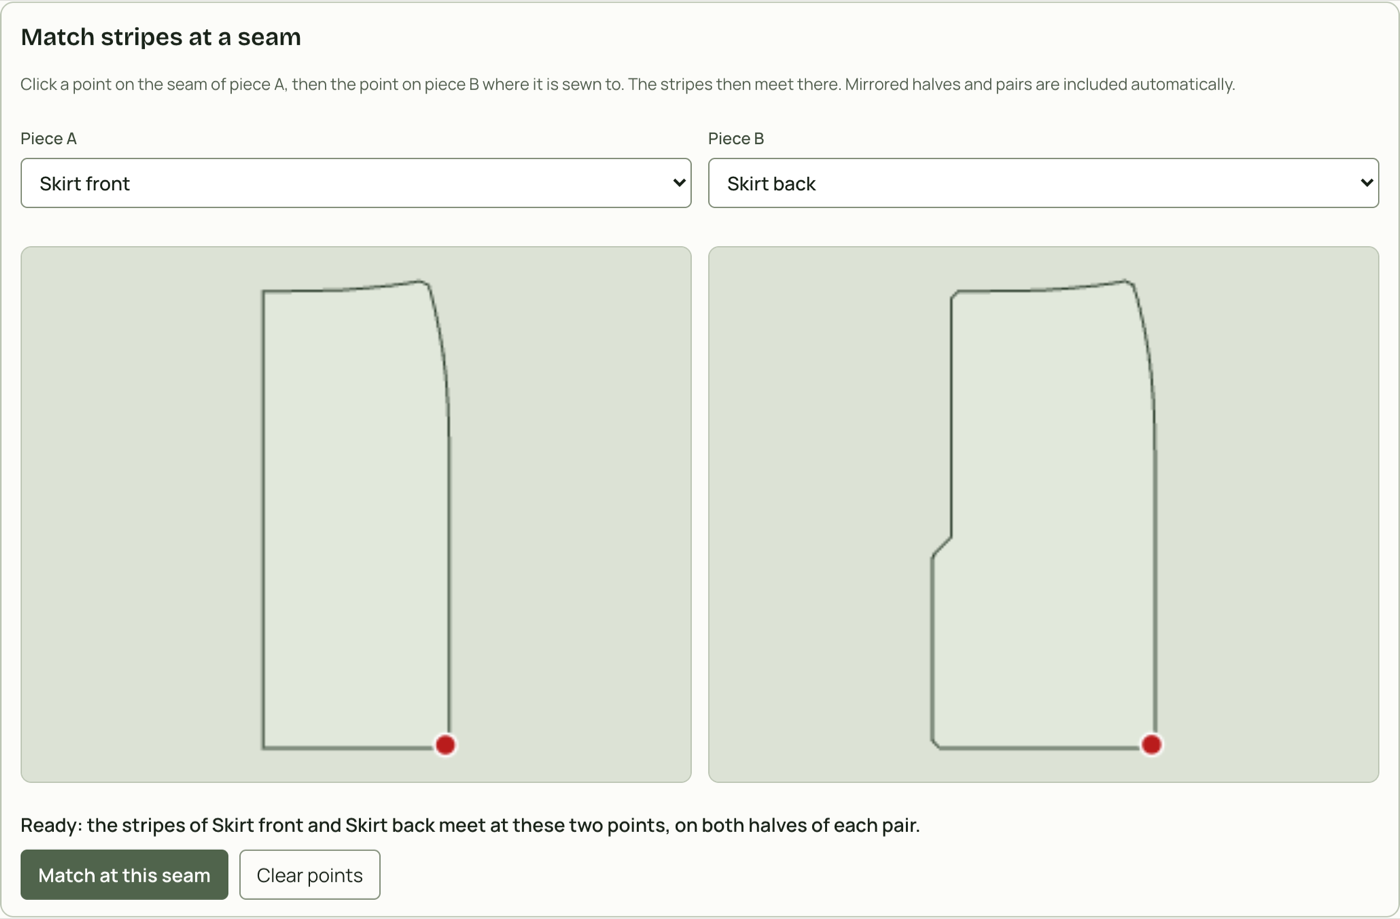
- Click Matching rules. Under Match stripes at a seam choose piece A and piece B and click the point on the seam of each where the lines should meet. For another seam, click Match at this seam and pick the next two pieces. Finally Apply matching.
- If a piece on the fold is not in any rule, a waistband for example, open the Advanced section in the matching rules, pick the piece and tick Explicitly allow this full piece on a single layer. Without it, matching in a single layer currently stops with a message.
- Click Calculate layout again. The difference to the first length is your extra for matching. For the real cut, add one repeat as a reserve.
What the layout does not know
PatternNest matches exactly the points you click. At other seams the lines can be offset if you set no rule there. For a pocket or yoke that should disappear into the plaid, you need a rule of its own.
The computation uses a repeat that is the same everywhere and lies exactly along and across the grain. Real fabric is sometimes printed or woven off grain, and uneven plaids have different spacing left and right. Then check the layout on the fabric before you cut, and buy a little more.
Download and recompute
The .pnest projects hold pieces, fabric pattern and rules, not a finished layout. Open them in PatternNest with Open .pnest and click Calculate layout. The SVG files are the layouts at 1:1 scale with the plaid, as PatternNest exports them. The pieces are outlines with seam allowance for computing, without markings and without instructions. To sew, get Penelope or Simon in your measurements from FreeSewing.
How the numbers are checked
Every layout passed PatternNest's check on the real outlines: no overlap, at least 1 cm spacing, everything on the fabric and every rule met. On top of that came 258 cross-checks over all computations: matched never shorter than without matching, a larger repeat never shorter than a smaller one that divides it, horizontal stripes never longer than plaid, wider fabric never longer, and no length below the pieces' area divided by the width. 21 of them failed, all for the shirt, and exactly those cells are not on the page. Computed with the version of PatternNest that went online on 16 November 2026.
Further reading
What a nap or a one-way print costs is in One-way fabric. The whole shirt on four widths, with a blouse and a plaid flannel shirt, is in How much fabric for a shirt or blouse. How to estimate fabric for a skirt is in Skirt fabric. All guides are in the overview.
Sources
FreeSewing Penelope: design and code Wouter Van Wageningen. FreeSewing Simon: design and code Joost De Cock. Both MIT licence, exported with FreeSewing 4.10.2, 1 cm seam allowance, measurement sets cisFemaleAdult36 and cisMaleAdult42 from FreeSewing. Rules of thumb: Seamwork and sewing.org, linked above. Layout computation and article: Cayan / Madegrain.