
Match stripes and plaids at the side seam in two clicks
For stripes that should meet at the side seam you mark one point on each piece: where front and back are sewn together. PatternNest then lays both pieces so the stripes line up there and tells you how much fabric that takes.
Before you start
Import the pieces and set quantity, pairs, fold edges and direction as usual. Stripes have to keep their direction, so use “Keep angle (0/180°)” or “one-way (nap)”. A single layer is easier to match than folded fabric.
Measure the stripe repeat on the fabric: from the start of one stripe to the start of the next stripe of the same colour.
Step 1: set the fabric pattern
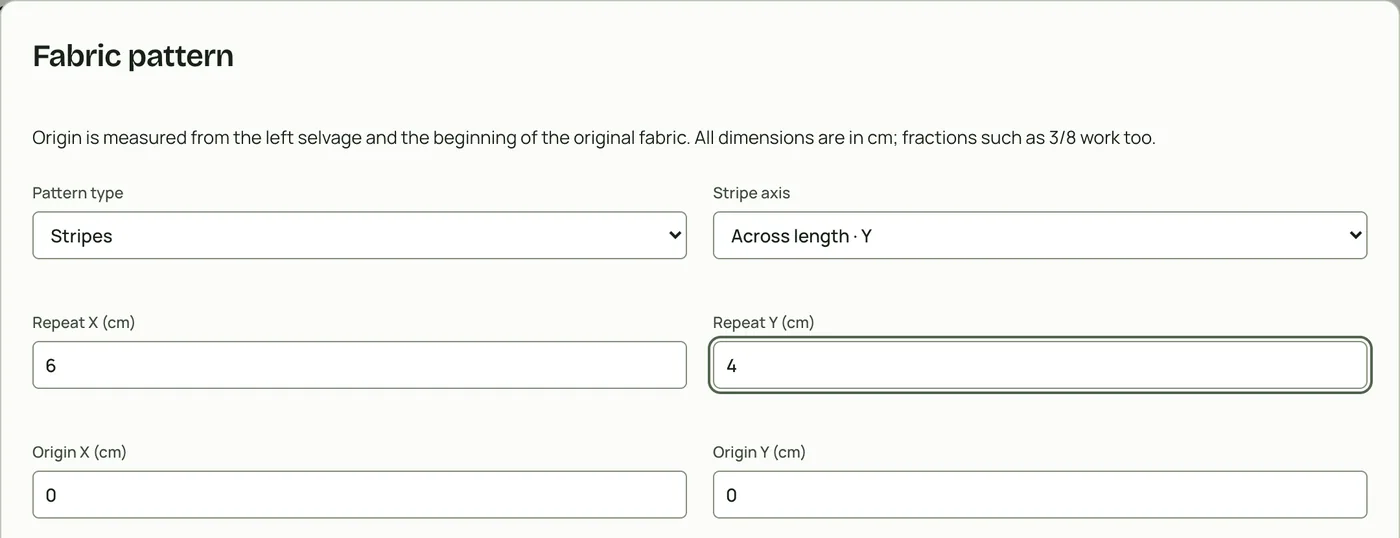
- Click “Fabric pattern”.
- Choose “Stripes” as the pattern type.
- For stripes that run across the fabric from selvage to selvage, keep “Stripe axis” at “Across length · Y”: the stripes repeat along the length. Enter the repeat under “Repeat Y”, for example 4 cm.
- Click “Apply pattern”. The button now says “Fabric pattern: Stripes”.
Step 2: click the seam
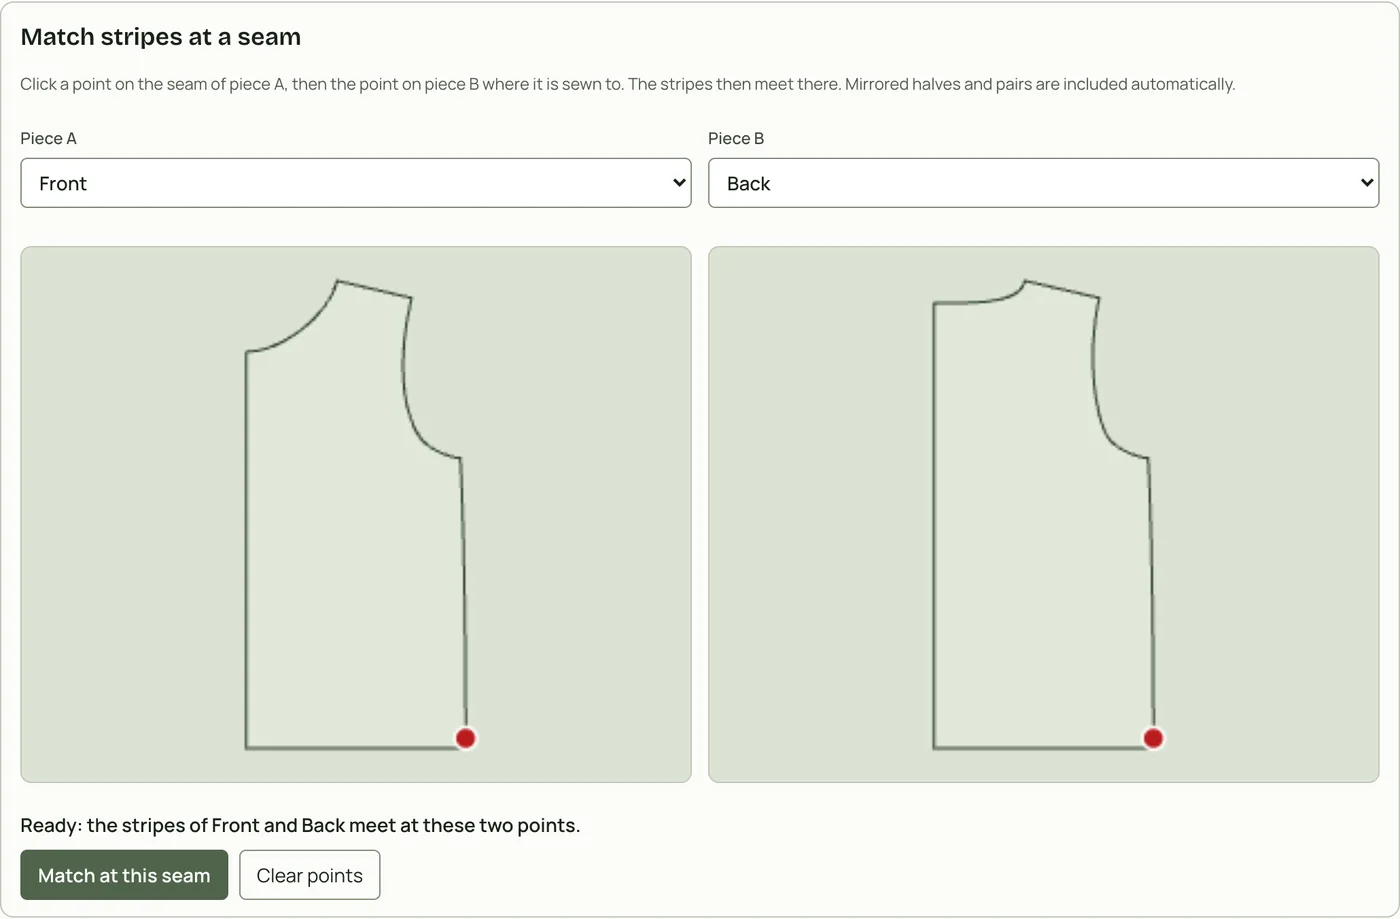
- Click “Matching rules”. At the top is “Match stripes at a seam”.
- Choose the front as “Piece A” and the back as “Piece B”.
- Click a point on the side seam of the front, for example just above the hem. Then click the same point on the back. The red dots show where you clicked; a click near the line snaps onto it.
- The line below says “Ready: the stripes of … meet at these two points”. Click “Match at this seam”, then “Apply matching”.
Pairs, fold pieces and more seams
Both halves of a pair and pieces on the fold are included by themselves. For another seam, for example the sleeve at the armhole, add it the same way before you click “Apply matching”.
Step 3: calculate
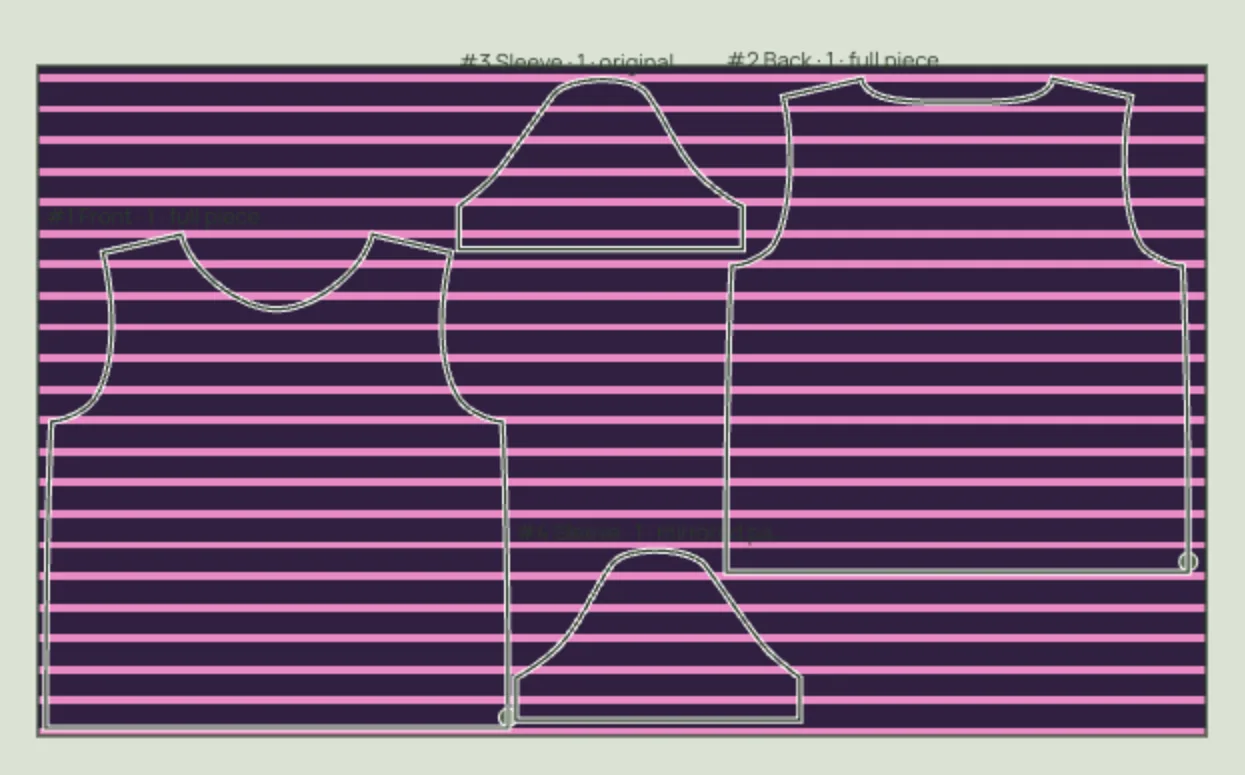
Click “Calculate layout”. In the example, the Teagan T-shirt in size 38 in one layer on 150 cm fabric, the plan with matched stripes needs 0.86 m. Without matching it was 0.72 m. The pieces can only sit where the stripes line up, so matching usually takes more fabric.
In the projector PDF the layer “Pattern matching” shows a cross on each matching point and the stripe grid. Before you cut, every cross must sit on its stripe.
Plaids and checks
For plaids such as gingham or glen check, choose “Plaid” and enter the repeat in both directions. The same two clicks then match the checks across and along the seam.
If something is missing
The line under the two pieces says what is still missing, for example “Set a fabric pattern first” or that piece A and piece B are the same piece. The mirrored half of a pair comes along by itself, so choose the piece it is sewn to as piece B.
If the plan stops on single-layer fabric because of a piece cut on the fold that is not part of any seam, such as a waistband, open “Advanced…” in the matching rules and tick “Explicitly allow this full piece on a single layer” for that piece.
Handedness, copies and offsets are also under “Advanced…”.
Further reading
Plaid in a worked example: How much fabric for a shirt or blouse has a plaid flannel shirt with matching, pajama fabric plaid pants. Checking the matching under a projector: the projector PDF and its layers.
How much fabric matching costs: How much extra fabric for plaid and stripes.