
PatternNest with paper patterns: the file you need and the plan as a layout guide
PatternNest can't read printed paper. It needs the pattern pieces as a file. Once it has them, you don't need a projector: you print the plan and lay your paper pieces on the fabric the way it shows.
Which file you need
Most PDF patterns come with more than one file: the print version on many letter or A4 pages, and often a large-format file for the copy shop (A0 or 36 in wide) and a projector file. Load the copy shop or the projector file into PatternNest. Each piece is complete on one page there.
PatternNest doesn't join tiled print pages. If your pattern only comes as tiles, it can't use the pieces as a whole. If a large-format file has several pages, import each page on its own; the import asks which page to use.
SVG and DXF files work as well, for example from FreeSewing, Valentina or Seamly2D. A pattern that only exists on paper, such as a printed envelope pattern, would have to be traced into a vector drawing first. Photos and scans are pictures, not outlines, and the import says so.
Print the plan and lay your paper pieces
- Load the file, choose your size and add the pieces. Set the quantity, “Cut as pair (mirrored)” and “Set fold edge” as your pattern says.
- Enter your fabric width under “Fabric” and click “Calculate layout”. The length above the plan is the fabric you need for this layout.
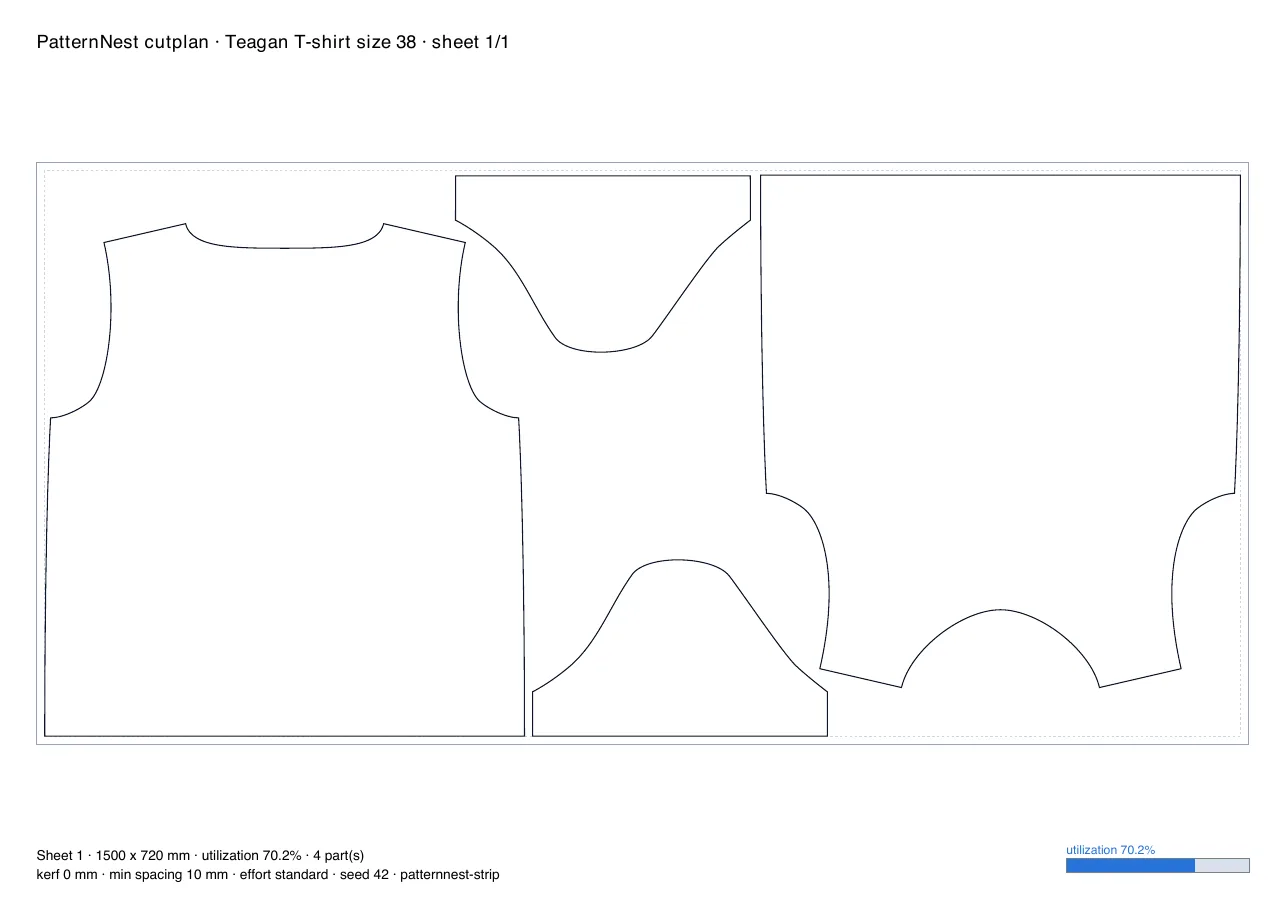
- Under “Cutting plan export”, click “PDF cutting plan”. It prints the plan scaled down on normal paper: the fabric with the outline of every piece, its width and the length the plan uses.
- Cut out your paper pieces as usual and lay them on the fabric in the places the plan shows, from the fabric start to the end. You tell the pieces apart by their shape. In PatternNest every piece in the plan has the colour of its icon in the piece list, which helps with pieces that look alike. For the second piece of a mirrored pair, turn the paper piece over.
- On folded fabric the plan shows the upper layer. Pieces on the fold lie with their marked edge on the fold.
Good to know
PatternNest keeps a cutting gap between the pieces, 10 mm unless you change it under “Layout settings”. Paper pieces fit the same way when you leave about the same space.
Trace or print the same size you picked in PatternNest. The plan only fits the outlines it calculated with.
If you sew with a projector later, the same plan also exports as a projector PDF at 1:1.
Further reading
Which pattern files work in PatternNest lists the file types tested so far. How to place pieces by grain, fold and order without software: How to lay out pattern pieces and make your own cutting layout. To print only one size from a multi-size PDF at the copy shop: Only your size from a multi-size PDF pattern.