
From your pattern to a projector PDF with notches and labels, without Affinity
If you've seen PatternNest used with a step in Affinity or Illustrator afterwards, to copy notches and piece names over from the original: you don't need that step any more. Notches, darts, drill holes, the grainline and the text of the pattern pieces now come into the projector PDF by themselves.
Load the file and choose your size
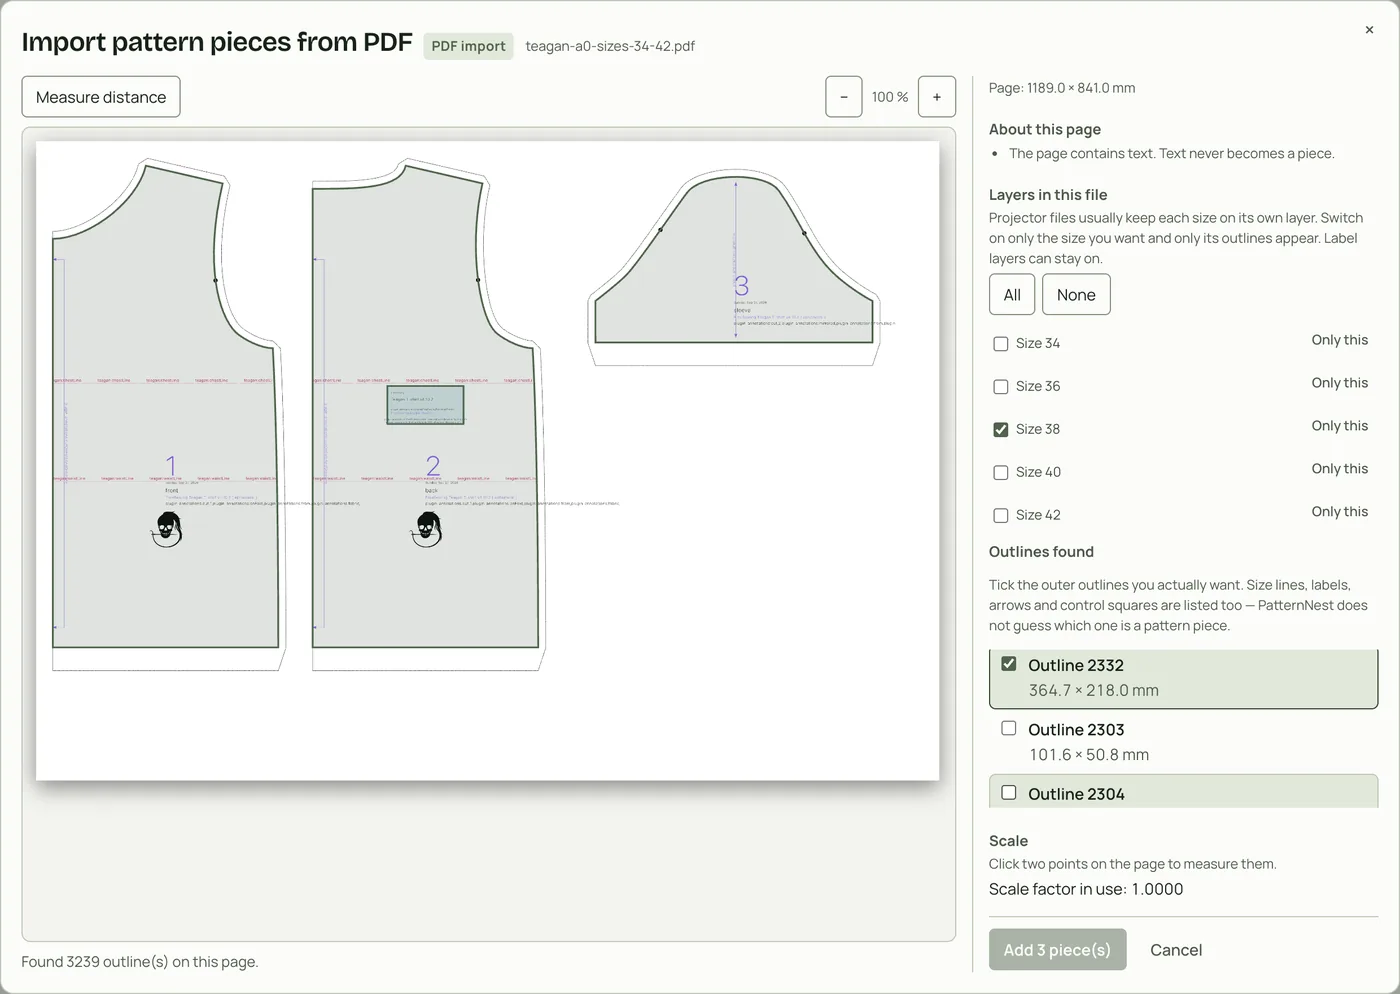
- Drop the pattern file onto “Pattern pieces” or pick it with “Choose files…”. PDF, SVG and DXF work. An SVG or DXF comes in right away, a PDF opens the import dialog.
- In the PDF dialog: if the file keeps sizes on layers, it shows “Layers in this file”. Click “Only this” next to your size.
- “Select all” ticks every outline in the list. Untick what is not a piece: the control squares of the file, or a seam line that some files draw as a closed outline inside the cutting line. Only the cutting lines stay ticked. Then tick “Selection and scale are correct” and click “Add pieces”, which shows how many pieces it adds.
Check names, quantities and fold
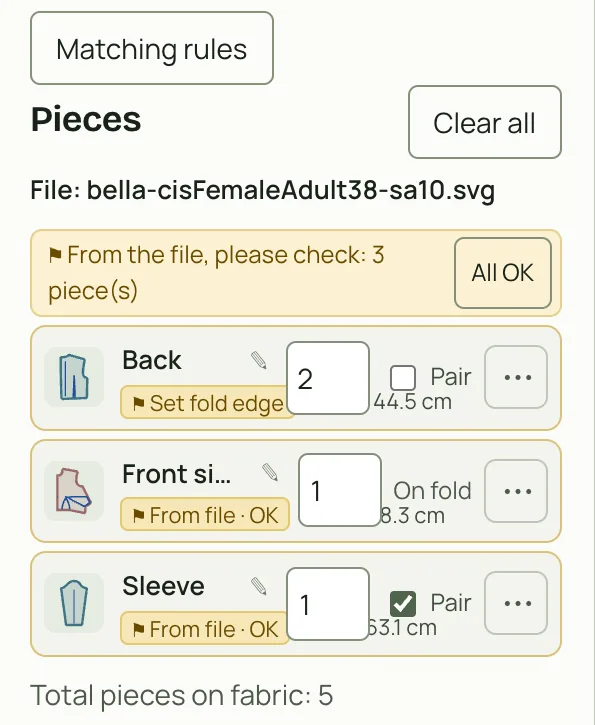
If the file prints names and cutting notes such as “Cut 2” or “Cut 1 on fold”, PatternNest suggests name, quantity, pair and fold from them. Those lines are marked “From the file, please check”. Compare them with the pattern and confirm each line with “OK”, or all of them at once with “All OK” in the banner of the file.
If the file says “on fold” but the fold edge is not clear, the line asks for it: pick it with “Set fold edge”. Set the direction too. If the grainline in the original runs across the piece, use “Turn 90°”.
Calculate and export
- Enter your fabric width under “Fabric”. For projecting, “Single layer” is more accurate than folded fabric.
- Click “Calculate layout”.
- Under “Cutting plan export”, click “Projector PDF (1:1)” and open the file in your projector app.
What's in the projector PDF
The cutting lines of the plan, and on their own layers:
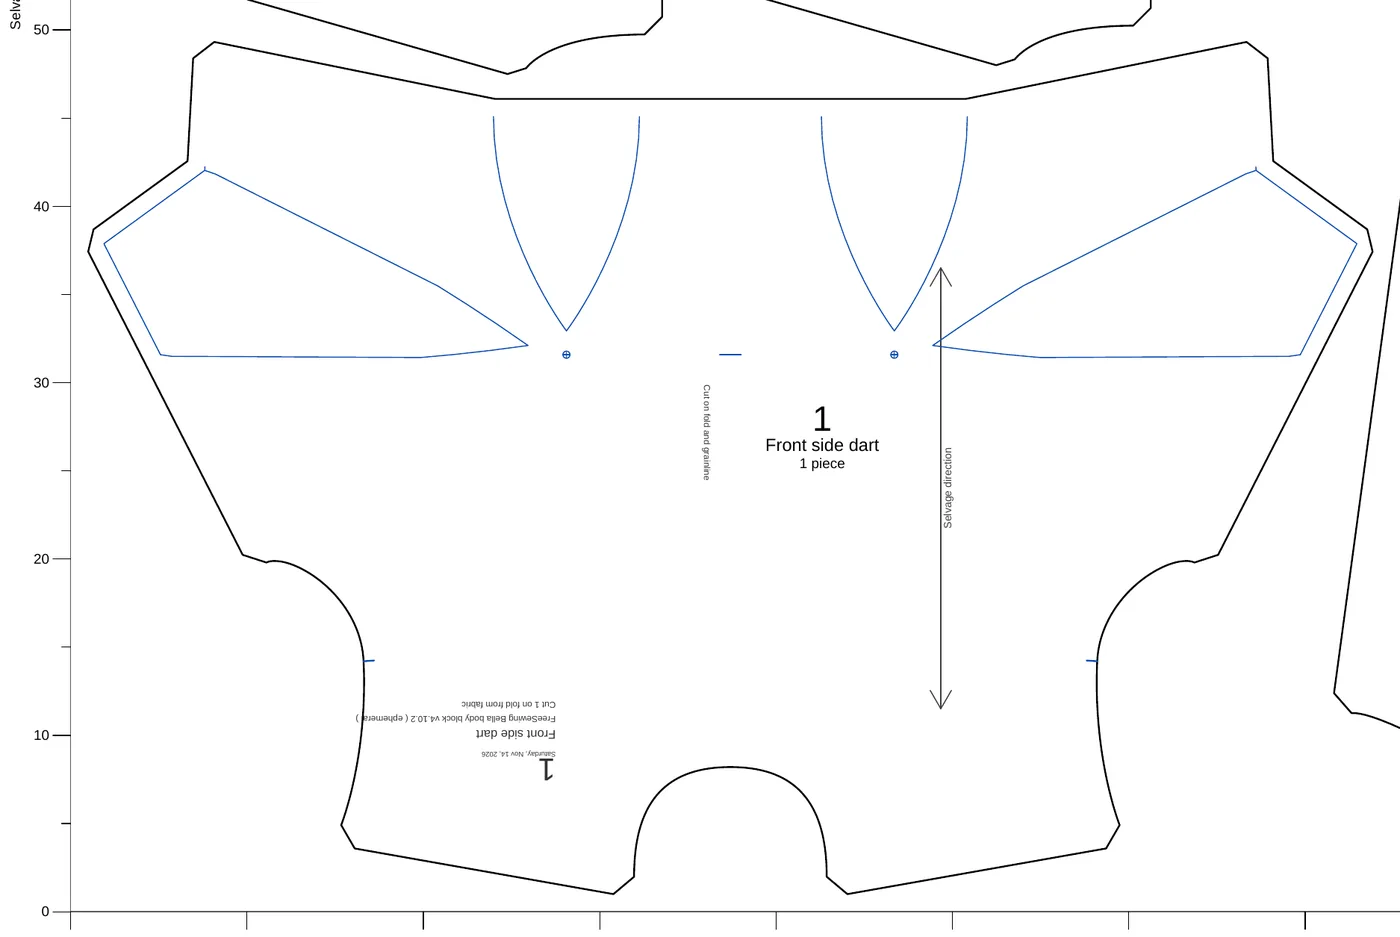
“Markings”: notches, darts, drill holes and the grainline from your file, turned and mirrored with each piece.
“Labels from the file”: piece names and cutting notes as they are printed in the file, turned with the piece and readable on mirrored pieces too. A “lengthen or shorten here” line comes along with its text.
Because each kind sits on its own layer, you can switch it off in your projector app while you cut.
Before you cut
Compare one piece with your original: notches in the right place, dart legs complete, the name right. PatternNest takes the outline you import as the cutting line and does not add or remove seam allowance.
If a file has no markings for a piece, the projector PDF says to transfer them from the original. That's also the case for patterns where notches are drawn only as part of the cutting line.
Further reading
Switching the layers on and off in Pattern Projector: the projector PDF in Pattern Projector. Checking the scale under the projector: calibrate with the test square. If the import shows a message instead of pieces: what the import messages mean.