
Projector sewing: lay pattern pieces out on your fabric width and project them 1:1
Projector files arrange the pattern pieces on a fixed area, which may not match your fabric. PatternNest lays the pieces out on your fabric width and saves the plan as a full-size projector PDF that you open in a projector app such as Pattern Projector.
Who this guide is for
Anyone who cuts with a projector and has the pattern as a single-page projector file or an A0 file. You want to project the pieces the way they fit your fabric, not the way they sit in the file: on your fabric width, on the fold or as a mirrored pair.
PatternNest doesn't stitch tiled print PDFs made of many letter or A4 pages. Use the projector or A0 version if your pattern includes one.
Load the file and choose your size
- Open PatternNest and drop the projector file (PDF) onto “Pattern pieces”, or pick it with “Choose files”.
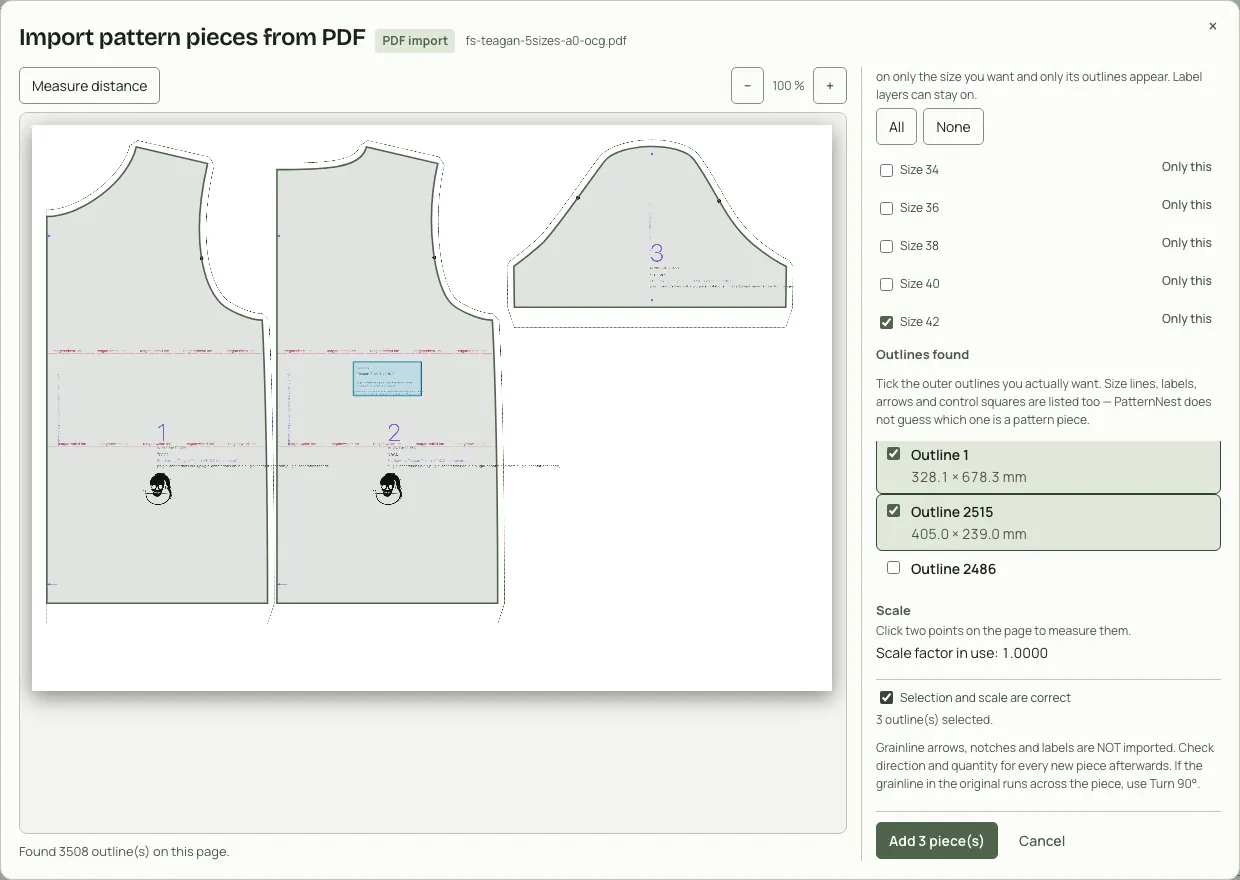
- If the file has layers, the import dialog shows “Layers in this file”. Click “Only this” next to your size, and only that size's outlines stay visible. PatternNest remembers the choice for this file.
- Tick the outer outlines of the pieces you need. The list also includes lines, labels and control squares; PatternNest doesn't guess which outline is a pattern piece. Tick “Selection and scale are correct” and click the add button, in this example “Add 3 piece(s)”.
- If the outlines in the file are drawn from separate lines, the import joins them into closed outlines and says so in the list.
Set fabric, direction and fold
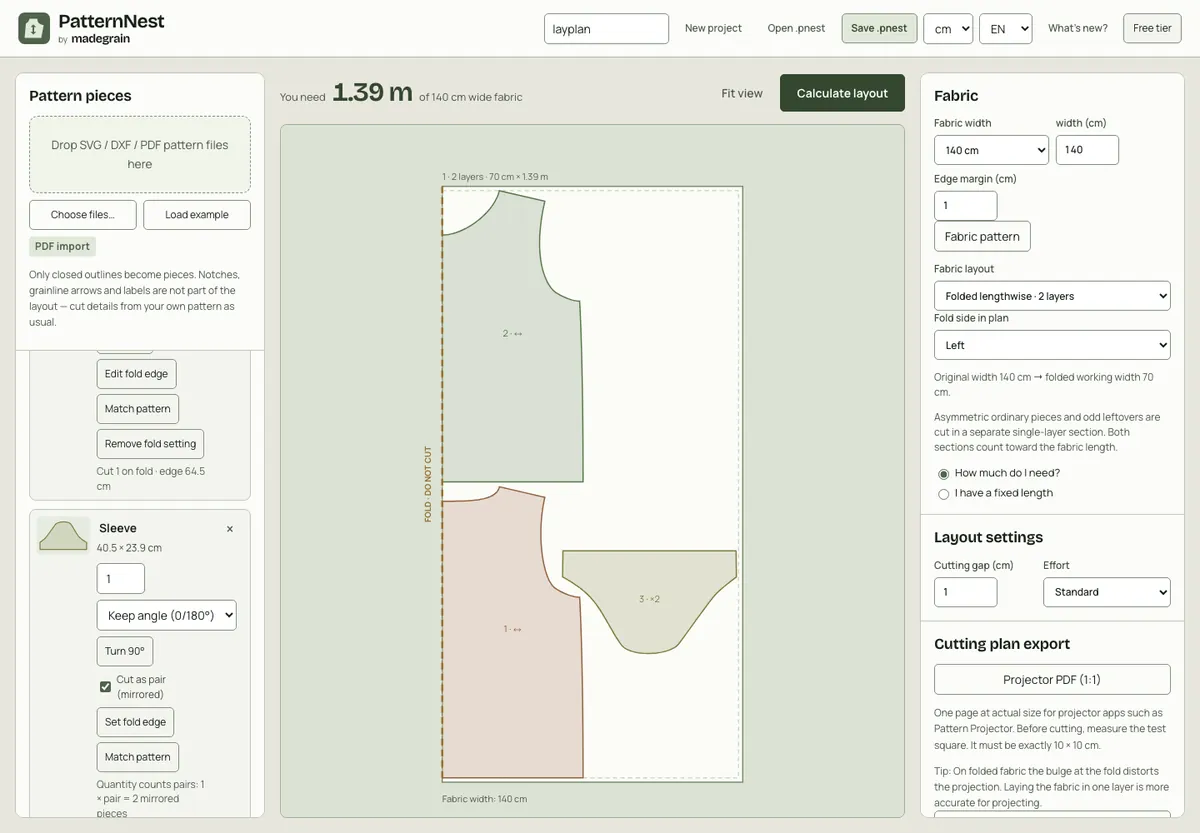
- Enter your fabric width under “Fabric”, for example 140 cm.
- Set the quantity and direction for each piece. PatternNest doesn't read the grainline from the file. Each piece is placed the way it is drawn. If the grainline runs across the drawing in the original, use “Turn 90°” on that piece.
- For cut-on-fold pieces, click “Set fold edge” and choose the straight edge that sits on the fold. The fabric layout then switches to “Folded lengthwise · 2 layers”. Mark pieces you need twice as mirror images with “Cut as pair (mirrored)”.
- Click “Calculate layout”. The fabric length for the plan appears at the top.
Export the projector PDF and calibrate
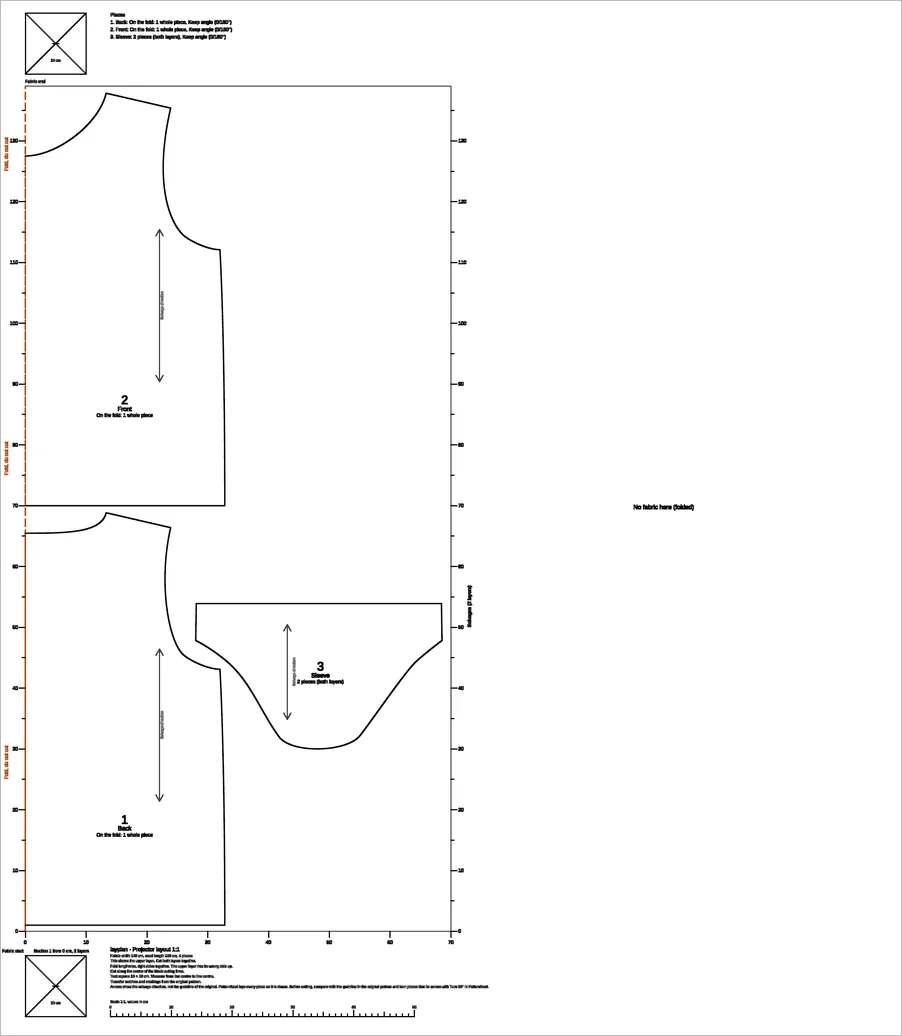
- Under “Cutting plan export”, click “Projector PDF (1:1)”. You get one page at actual size: the width is your fabric width, the length is the fabric the plan uses, with rulers along the edges and notes on fold and direction.
- Open the file in your projector app, for example Pattern Projector, and set up the projector the way the app describes.
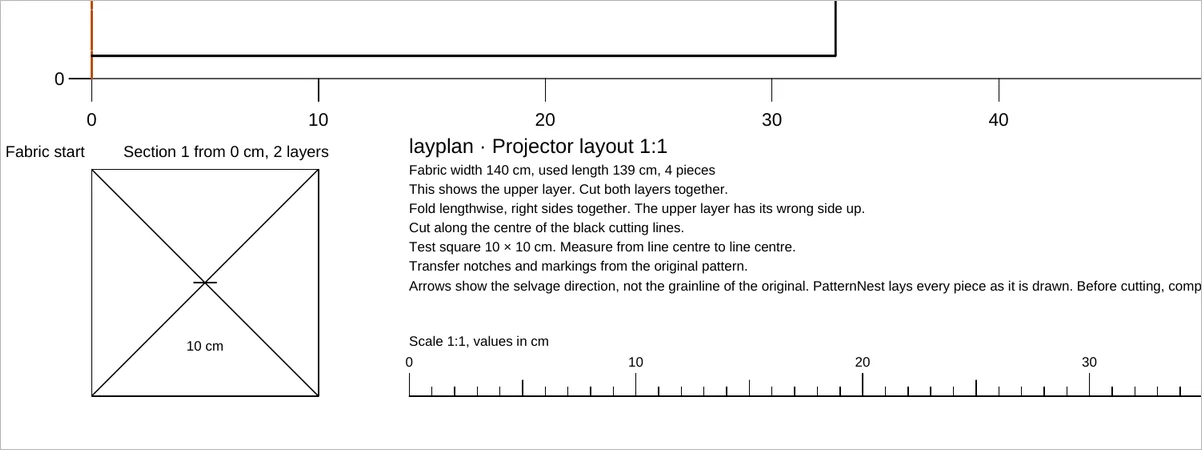
- Measure the test square on your cutting surface. It must be exactly 10 × 10 cm, or 4 × 4 in when you work in inches. If it's off, fix the calibration before you cut.
- Lay the fabric as the notes in the band at the fabric start say, at the bottom of the PDF. The piece list sits at the top, at the fabric end. Then cut along the middle of the cutting lines.
What the projector PDF leaves out
Notches, darts and markings aren't included in the projector PDF. Transfer them from the original pattern. The arrows in the PDF show the selvage direction, not the grainline from your file.
On folded fabric, the bulge at the fold can distort the projection. A single layer of fabric is more accurate under a projector. From a page length of 5.08 m, PatternNest saves the page at 1:1 using the PDF setting UserUnit and says so after the export: “The page is longer than 5 m”. The start and end bands make the page about 31 cm longer than the plan, so this applies to plans from about 4.8 m. Apps that ignore UserUnit show the page scaled down. Either way, the test square tells you whether the size is right.